

Capture One 20 - These are our favorite new features
Reading Time: 5 minutes - December 04, 2019 - by Niels Stiefeling
Adobe's biggest competitor in the image editing space has a brand new version waiting in the wings, and it brings with it some new features that make the all-in-one Capture One package a little more well-rounded in itself. Shortly after I bought my first camera, I - like many other starting photographers I'm sure - started looking around for a way to capture images in RAW to exploit the full potential of digital sensors. Of course, everyone is familiar with Photoshop by now. So you get to Adobe's RAW converter Lightroom relatively quickly and are quickly pulled into the Adobe ecosystem without much looking around for alternatives.
Then a few months ago I got the chance to use Capture One 12 and was immediately excited. The industry leader Lightroom was forgotten relatively quickly after some initial adjustment difficulties and in fact hasn't been used once since - yes, I was surprised too. But what's so great about Capture One? And who should take a closer look at the program, especially now for the update to the latest version?
Colors are the be-all and end-all
Both the correct reading and processing of the colors of current sensors and the selective processing of these colors is the true core of the software. I can't prove it, of course, but to my eye, results I get with Capture One in combination with my camera look more coherent and, in the end, just better. I also have the feeling that I am consistently satisfied with my results faster.
The color editing has now also been expanded by a small feature. Using the basic color editor, you can easily move the hue, brightness and saturation around in the image. Just click on the color you want to change. With the left mouse button held down, you can adjust your colors as you like in one motion. For clear and light color adjustments this is the simplest solution and very catchy.
On the other hand, for more complex color adjustments or editing skin tones, the two tools are Advanced Color Editor and Skin Tone Editor. The possibilities that Capture One offers here are virtually limitless and can lead to very fine, high-quality results.
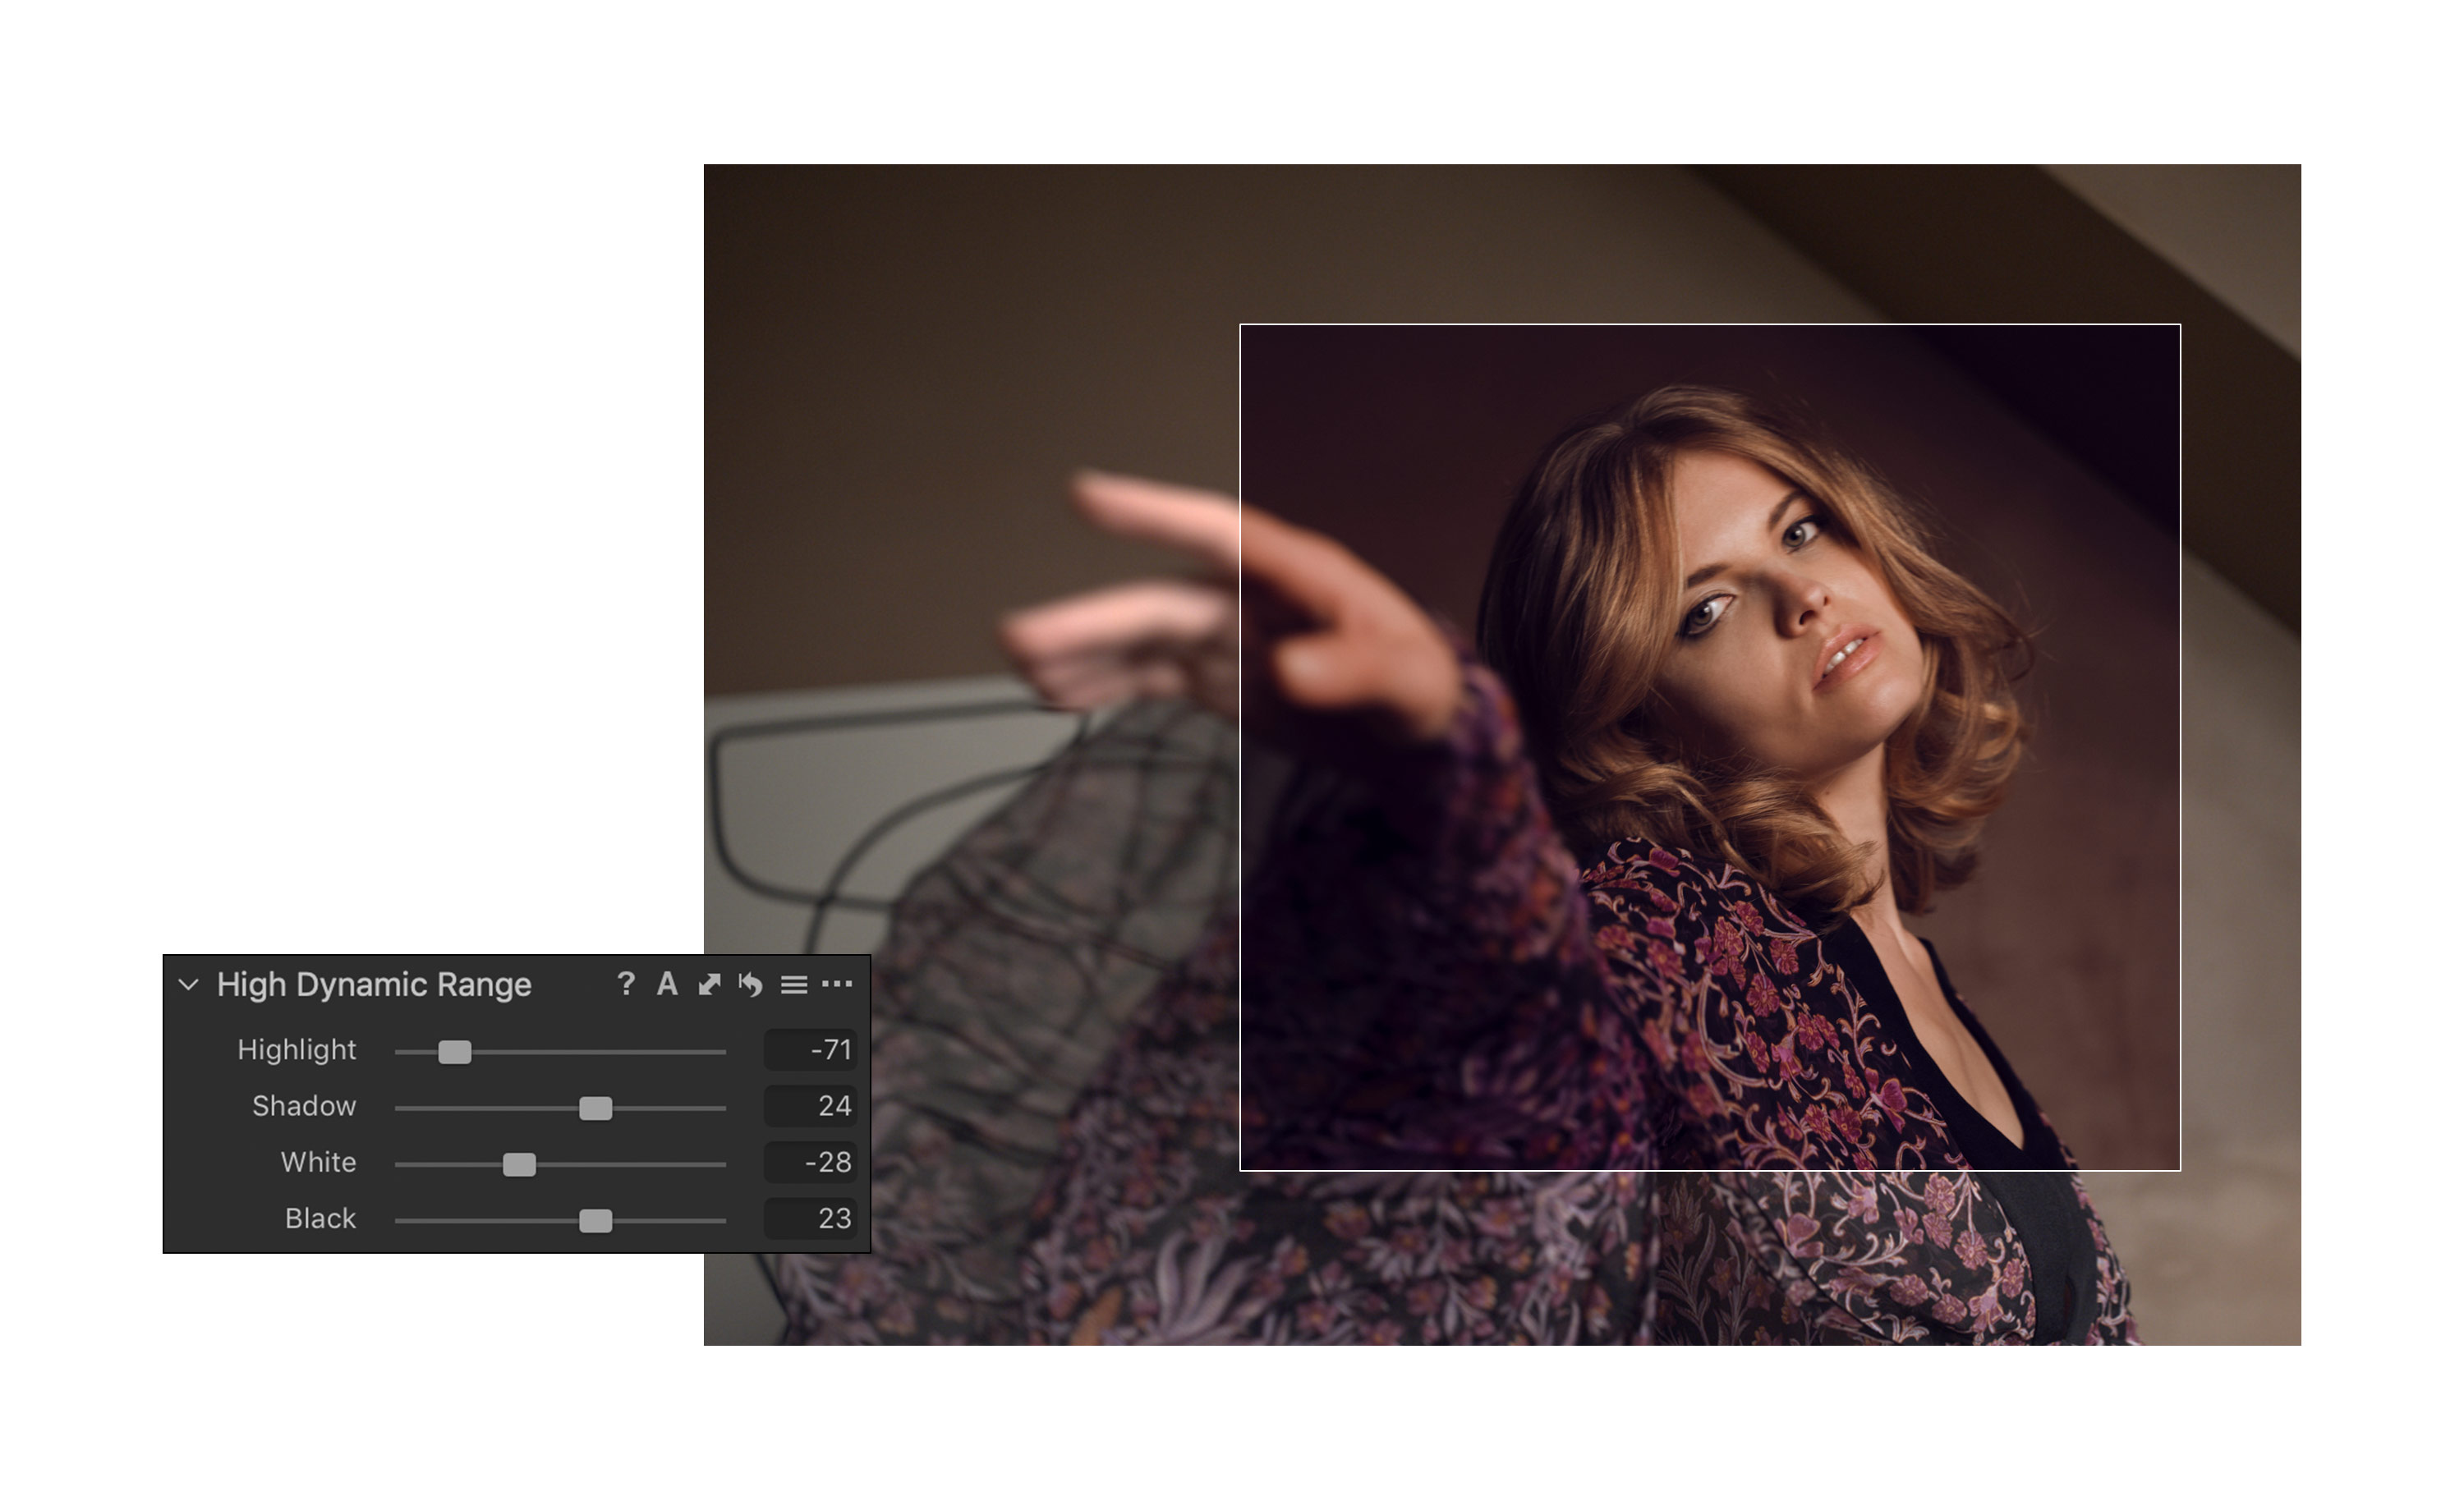
HDR made easy
In other areas, the new version has taken its cue from its big competitor, eliminating what I consider one of the biggest criticisms of the current software. The High Dynamic Range tool now works just like you would find in Lightroom. There are 4 different sliders that allow you to adjust highlights, depths, whites and blacks individually. This leads to more control and easier adjustments.
Do it the way you want
Also nice: In the Crop Tool you now have so-called handles on all sides of the desired crop. So you can easily start at each desired side to bring the image in the desired cut. In the old version, this was sometimes a bit more complicated and could cost you nerves.
The new option of not only being able to freely arrange tools as before also makes for a more pleasant workflow. Now, individual tools can be fixed in a separate section at the top. This way, frequently used tools can remain permanently accessible further up, while other less used customization options can be scrolled through further down. Especially when combined with Capture One's very powerful layer support and excellent masking capabilities, this makes quite a difference. Now you can conveniently see a permanent overview of your layers and jump through the selection of them faster than ever before. It's more convenient, clearer, and most importantly, much faster!
Efficiency is everything
Speaking of faster: You can now set that the next image is automatically selected in the process of marking and rating, as soon as the current has received appropriate markings. I haven't discovered this option yet, but it effectively means 50% fewer clicks. Especially with completed shoots or orders, the correct selection of images and the appropriate marking can swallow a lot of time. That's where this new feature comes in handy.
My highlights of the program for photography from landscapes to portraits are definitely the layers in combination with masking options, similar to what you know from Photoshop. This allows edits to be applied locally, toned down or enhanced afterwards, and even removed completely if needed. The ability to copy layers and also masks between images and layers, allowing you to continue to work quickly and variably, has been extended by the update. This is also a sensible step and plays to the strengths of Capture One even better.
By the way, Capture One is even more worth a look for photographers who also do commissioned work. The two-part structure via catalogs and sessions is a real boon for this. Individual shoots or events can be easily edited in the closed environment of the sessions. Within such a session there are only the images selected for it. As soon as the job is done, sessions can be imported into an existing catalog and the session can be deleted. This ensures a good overview of his projects and efficient processing of them
Conclusion
Most of the new features in Capture One 20 don't seem to have too much of an impact at first. In fact, during my first use of the latest version, many of the new features eluded me.
After a while, though, you realize that the improvements in many areas make the workflow feel much more rounded. There are fewer and fewer moments where you feel slowed down. Even if some new features seem unimportant at first: My personal criticisms have been fixed by the update and meaningfully improved. In other areas, Capture One plays to its strengths even further and is thereby even more powerful and actually a little bit more interesting for every photographer


