Guide to volleyball photography
Exciting games, fast rallies, great emotions - volleyball is one of the most popular ball sports in Germany alongside soccer and handball!
It is a captivating mixture of teamwork, strategy and explosive energy. Two teams battle to hit the ball over a net and bring it to the ground in the opponent's court, while at the same time having to react with lightning speed to fend off the opponent's attacks. What triggers pure excitement for the audience becomes a major challenge for us photographers: rapidly changing situations, little light and tight workspaces.
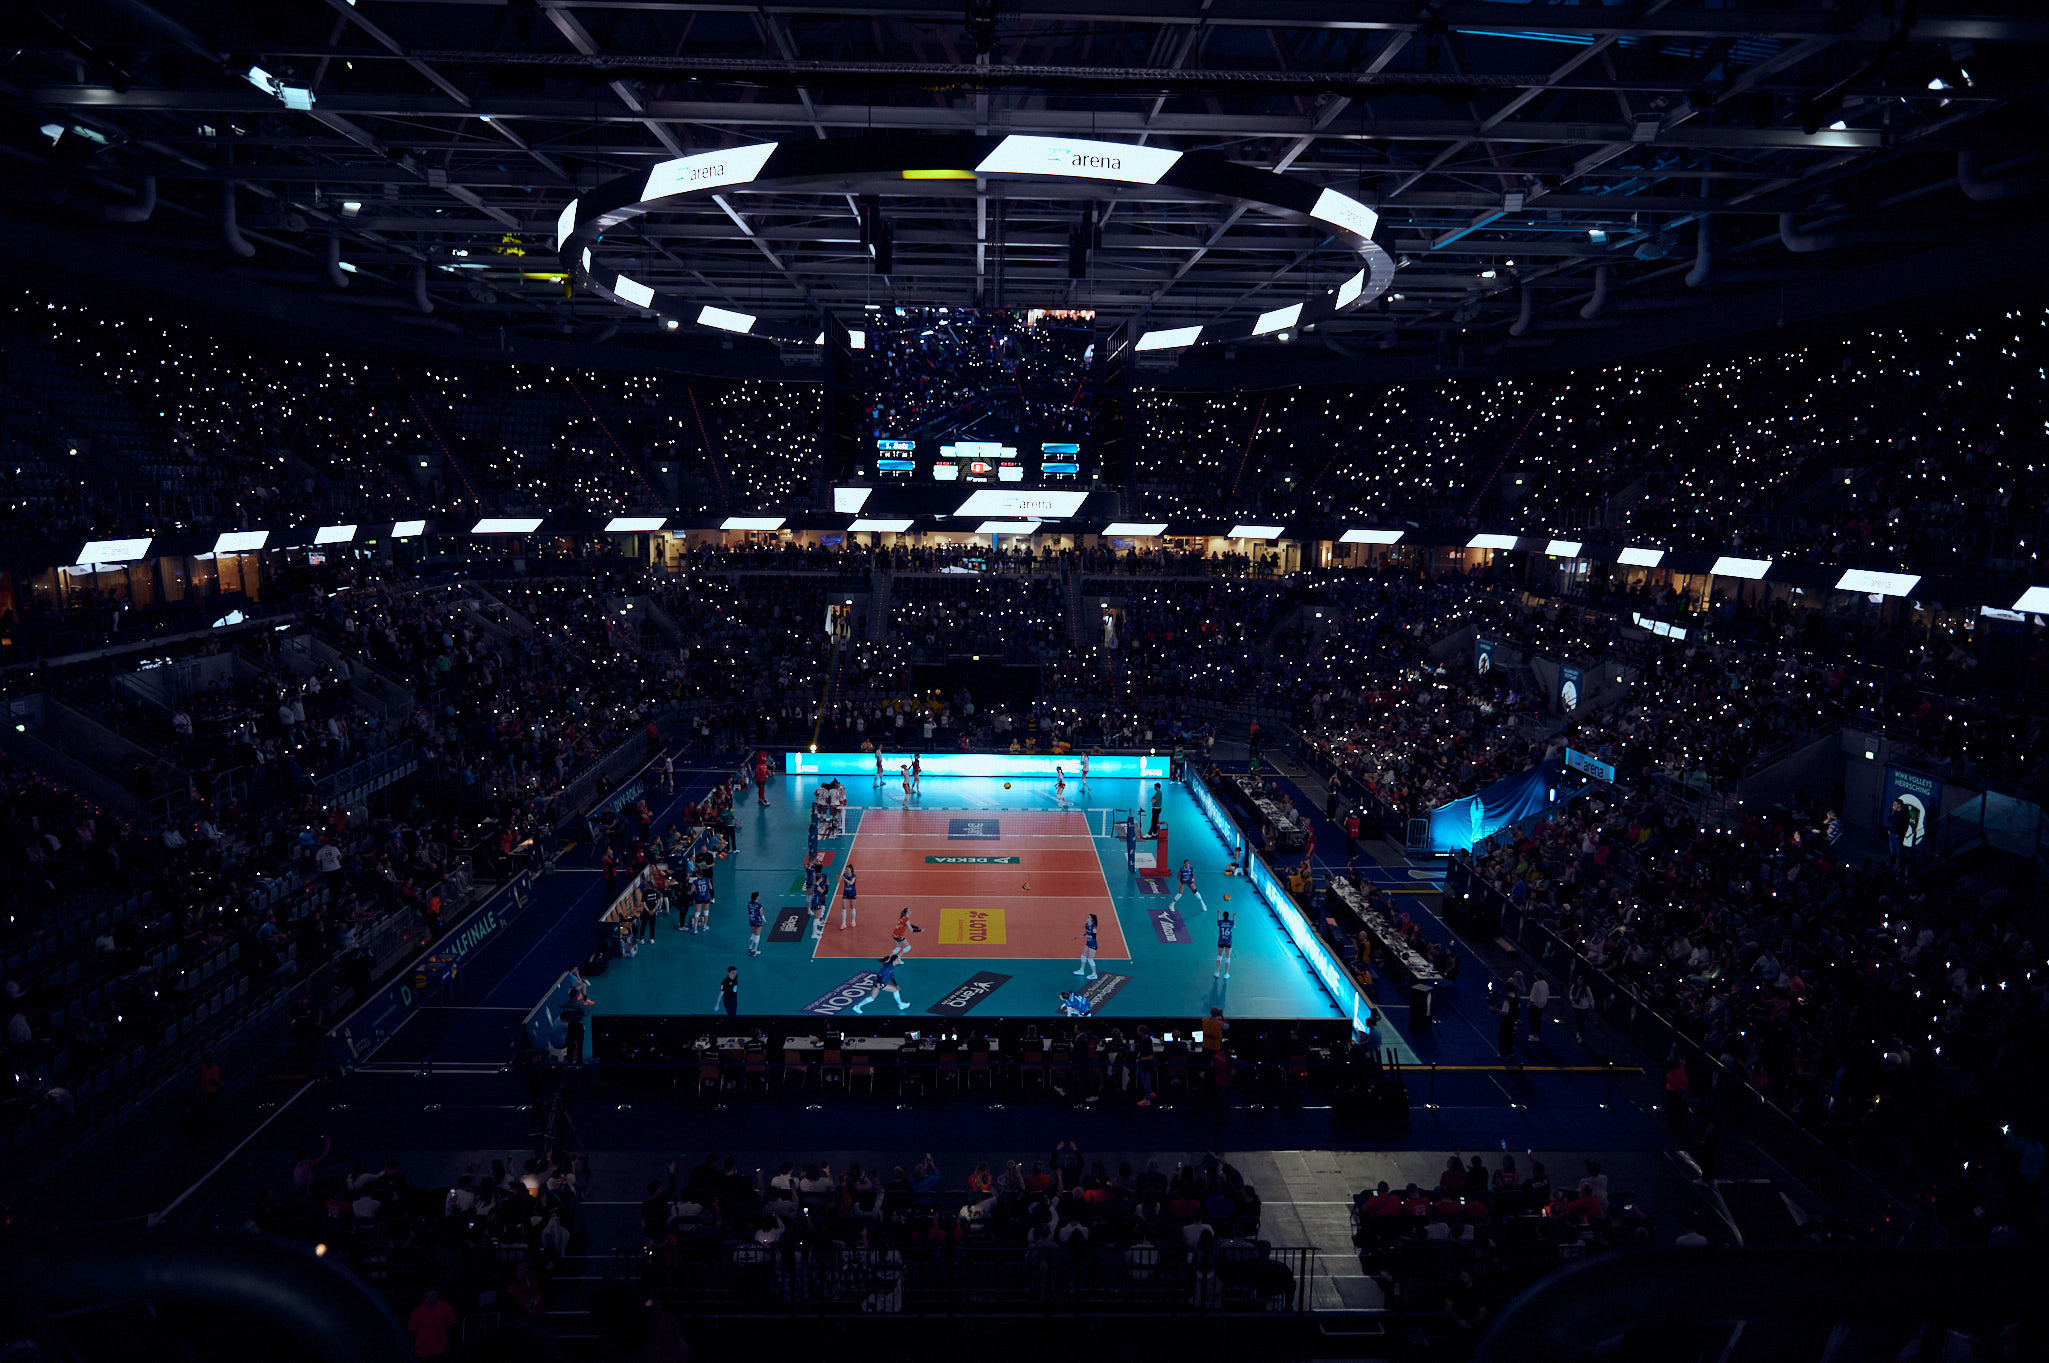
 How to photograph volleyball matches - DVV Cup Final - Photo: Oliver T. Rubert
Camera requirements
With the exception of snow and beach volleyball, volleyball is played indoors. Apart from the top leagues, you will mainly be playing in smaller halls with poor lighting. For this you need very fast shutter speeds (usually faster than 1/800s) and usually a rather [s-t-r-o-n-g]higher ISO value. In short, you need a camera that works well in low light. Due to the technical developments of recent years, I would clearly recommend mirrorless system cameras instead of DSLR cameras, precisely because they can generally handle higher ISO values better. Of course, this also raises the question of whether full-frame or crop sensor, e.g. APS-C. The clear advantage of full-frame cameras is that with the same number of pixels (in most cases around 24 MP), the area per pixel is larger, which means that more light can fall on the individual pixel. This allows you to achieve significantly better performance with the camera in the given low light conditions. This is also due to the high ISO, which is associated with less background noise in full-frame cameras. (More information on the advantages of full-frame cameras here)
An integrated image stabilizer (IBIS) is less necessary due to the very fast shutter speeds. Another, if not the most important criterion, is the camera's autofocus system! Because only if your autofocus can adjust quickly enough can you keep up with the fast changes in the situation. But: even with slower or even manual focusing, you are not necessarily at a loss, as you can at least anticipate situations at the net and defensive actions relatively well and set the focus point in advance. This means you can also take your first steps in volleyball photography with smaller cameras.
The right Lens for your subject
As already mentioned, we often have to deal with poor lighting conditions in volleyball in combination with fast movements and correspondingly short exposure times. That's why you should work with the fastest possible Lens. Most people would probably go for fixed focal lengths with an aperture of f/1.8 or even f/1.4, such as the SIGMA 85mm f/1.4, but I would personally advise against this. Of course, the amount of light that hits the sensor with such an open aperture is good for us.
However, you face two challenges with these Lens: Firstly, you're not as flexible with the fixed focal length. In volleyball, it can always happen that the action from the other side of the court suddenly shifts a meter in front of you. If you're then sitting 2m away with 85mm on the camera, you're very likely to see very little of the player and/or the ball.
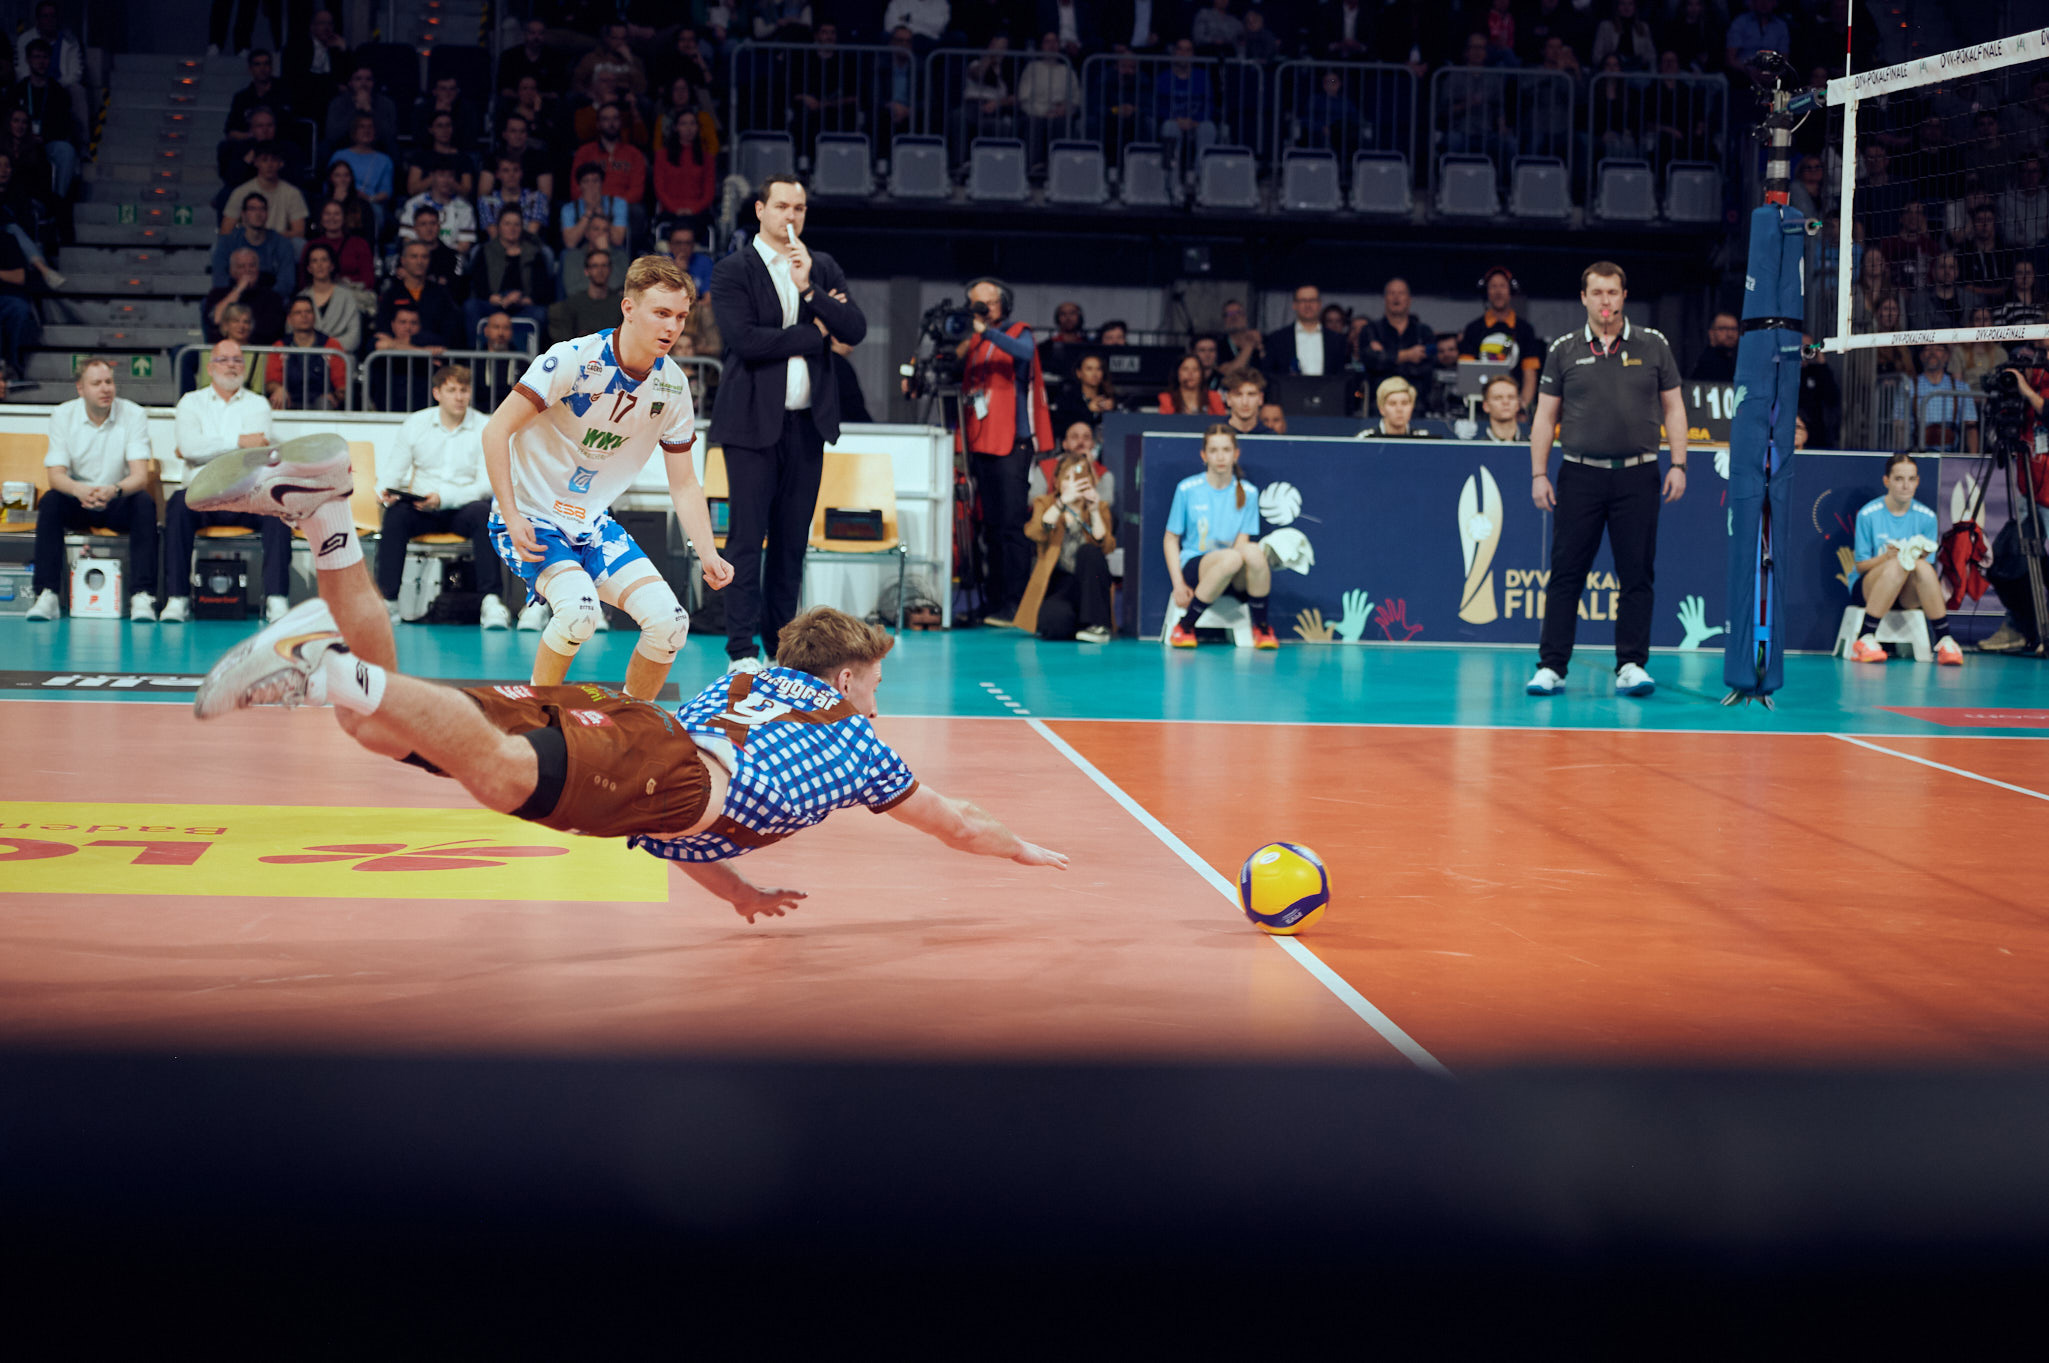 Seeing situations and capturing them photographically - Image: Oliver T. RubertSeeing situations and capturing them photographically - Image: Oliver T. Rubert
In addition, due to the significantly shallower depth of field at such a high aperture, you have much higher demands on your autofocus and therefore have a much higher risk of your images not being sharp due to the fast movements. Therefore, for sports photography in general, I would always recommend the standard zooms, i.e. a 24-70mm 2.8 and (ideally on a second body) a 70-200 2.8. Lenses like the 14-24mm 2.8 can also be quite nice, depending on the purpose, but are more nice accessories than real must-haves.
Always consider the size of the hall when choosing your Lens! A 70-200mm Lens won't do you much good in a small school gym where you're practically sitting on the sidelines. Conversely, only the 24-70mm will be of much less use in a Bundesliga match where you are at least 3m away from the touchline. If you have both lenses (or comparable focal lengths) available, you are very flexible and can react well to rapidly changing game situations with the zoom.
What is the best way to find a game?
Of course, this mainly depends on which league you are looking for. In general, I would recommend the lower leagues to start with, as the game runs a little slower there and is therefore easier to photograph. So it's best to simply look for clubs in your area, check their website or social media channels to see when the next home game is. Then simply send a friendly email or social media message asking if you can come along. In the vast majority of cases, this is not a problem unless it's a cramped school gym, but more on that in the next point.
If you already have experience in sports photography and are interested in higher leagues (1st/2nd Bundesliga, everything below is still as described above). On the clubs' websites, you will usually find either a contact person for the press or even a ready-made form to obtain accreditation, i.e. a "photographer's pass" for the relevant match. Depending on the size of the club, however, it may be that due to limited capacity, accreditation is only open to press photographers and appropriate proof is required. In case of doubt, however, there is never any reason not to send a friendly e-mail and ask if you would simply like to try your hand at it.
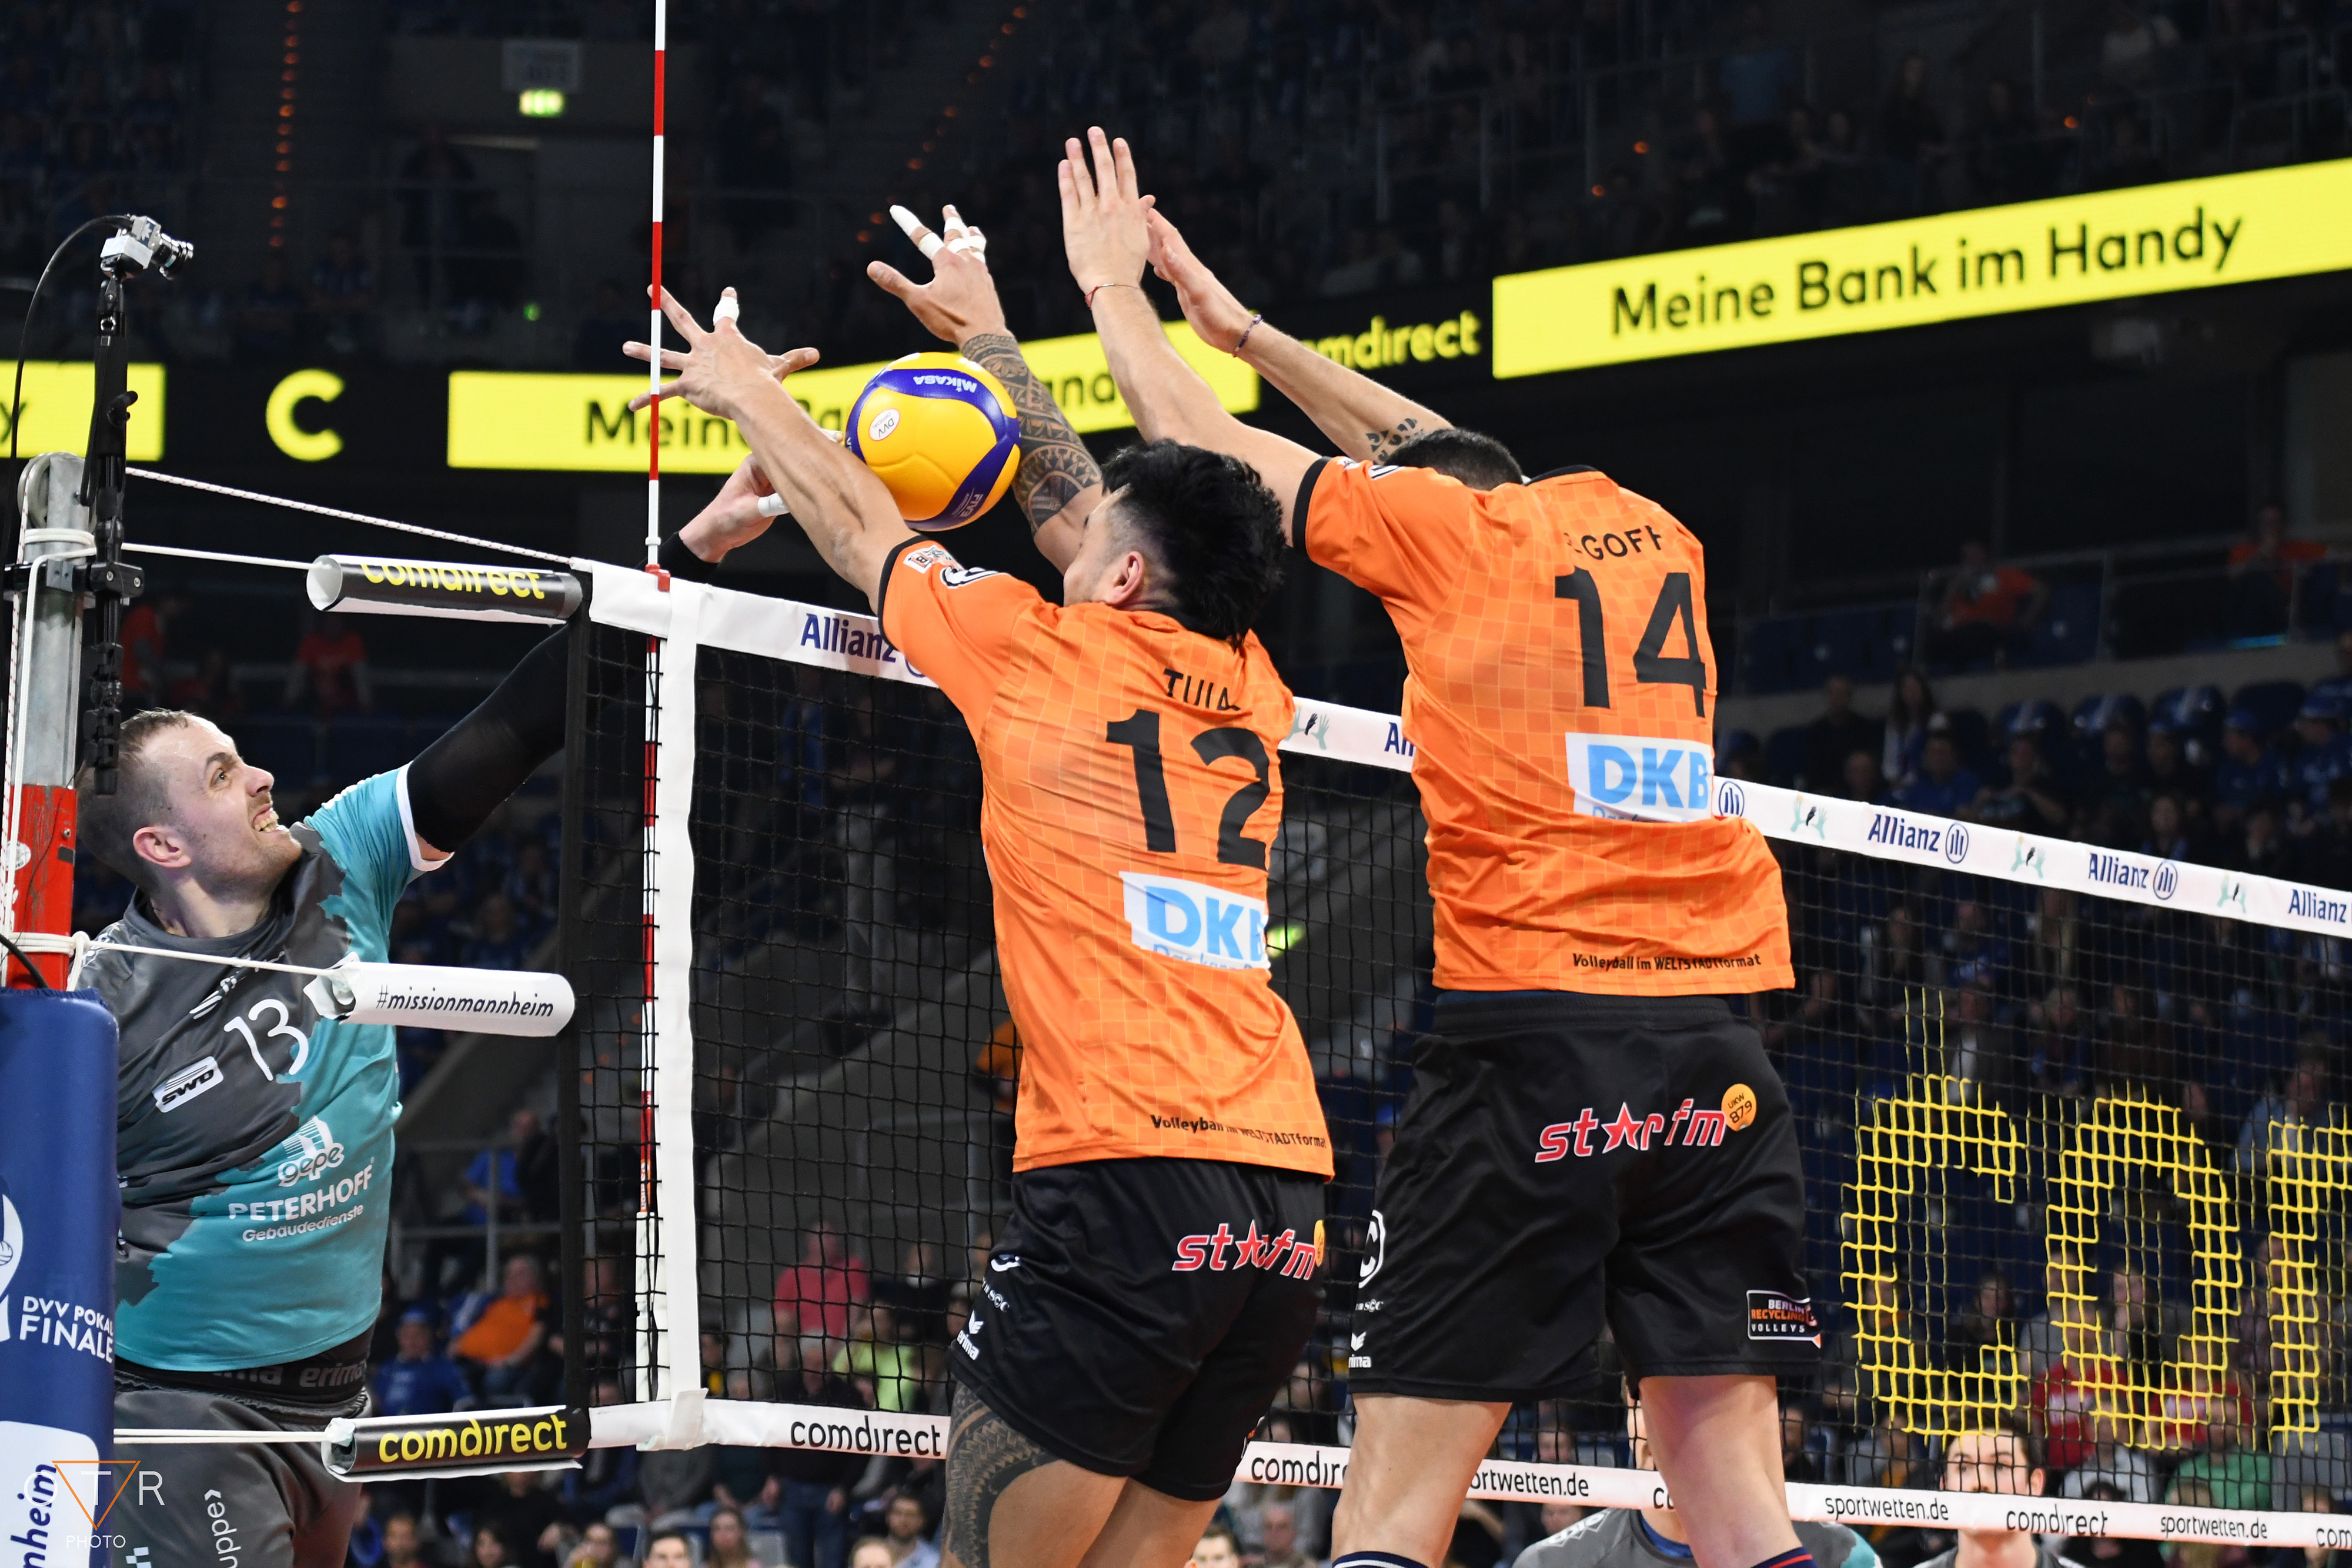
 Seeing and photographing situations at the volleyball net - Image: Oliver T. RubertSeeing and photographing situations at the volleyball net - Image: Oliver T. Rubert
For national and international competitions, i.e. the German Cup, European Cup, European Championships or World Championships, things get more complicated, because here the request for accreditation is only possible via the press portals of the German, European or international volleyball association and registration alone may already require proof of press work. However, as this is unlikely to be relevant for most of us, I will focus my tips below on the national leagues and below.
The procedure on site is usually quite simple: for the smaller clubs, you can simply come into the hall before the start of the game, find your spot and start taking photos. In the national leagues, you either start at the ticket office or (if available) at the press desk, where you then get your accreditation, usually to wear around your neck, which shows that you are allowed to enter areas where spectators are not allowed to go. More detailed information will usually be given to you on site, i.e. which areas may be off-limits to you or whether you need to pay attention to anything special (e.g. pyrotechnics at the kick-off). It's best to use the time while the teams are still warming up and playing in to test your settings.
Then you're ready to go!
The perfect location! The choice of location
In general, there is of course no "one" spot in volleyball from where you can take the perfect photos, but it always depends on which game situations (attack, defense, block, cheering?) you want to capture. So let's start with a brief overview of how the pitch is set up:

Each half of the court measures 9x9m and both halves are separated by the net. The first referee stands on an elevated position, directly in the middle of the net, opposite is the second referee and the scorer's table. The team benches are to the left and right of the scorer's table.
There are always 6 players per team on the court, who are generally only (allowed to) play the ball in their half of the court. The matches are played over three winning sets, i.e. a maximum of five sets in total, which go to 25 points and require at least a two-point lead to win. The exception to this is the fifth set, which only goes to 15 points
Each rally begins with the serve, whereby the ball must be played directly over the net. Each team may then touch the ball up to three times after the opponent has touched it before it must be played to the opponent. It does not matter whether the ball is played with one hand or with both hands at the same time. If the ball touches the floor or the ceiling, a point is scored, depending on who touched the ball last.
But where is the best place to take photos?
Roughly speaking, there are four situations that definitely offer good motifs: Defensive actions, attacks, blocks and players' emotions/cheers after winning a point. The latter are the easiest in terms of location: you can capture the cheering moments from pretty much any side of the pitch, as long as you're not standing right behind the team bench.
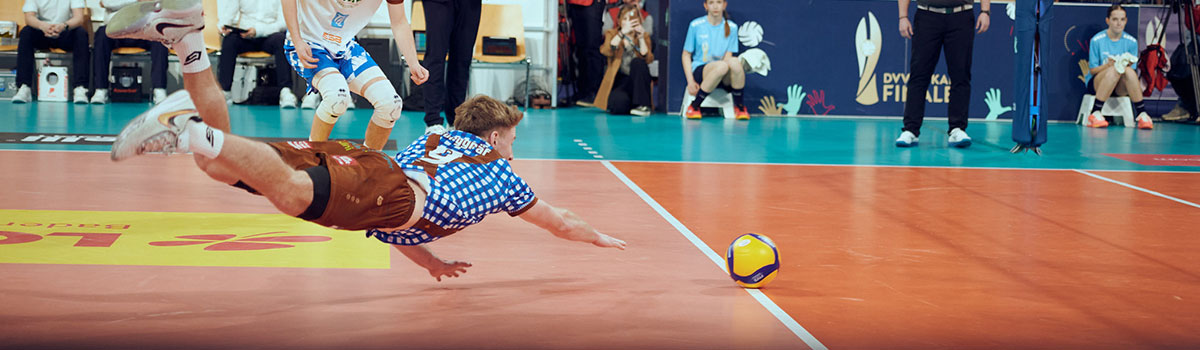
In general, you usually want to see the athlete's face in sports photos, as the face shows the most emotion to the outside world. Roughly speaking, this means that you should be somewhere in the players' field of vision. Defensive actions usually take place in the back third of the court (as seen from the net). Depending on how much you want to have the players in the side profile, you should position yourself on the long sideline of the court, ideally between the center of the side and the net post.
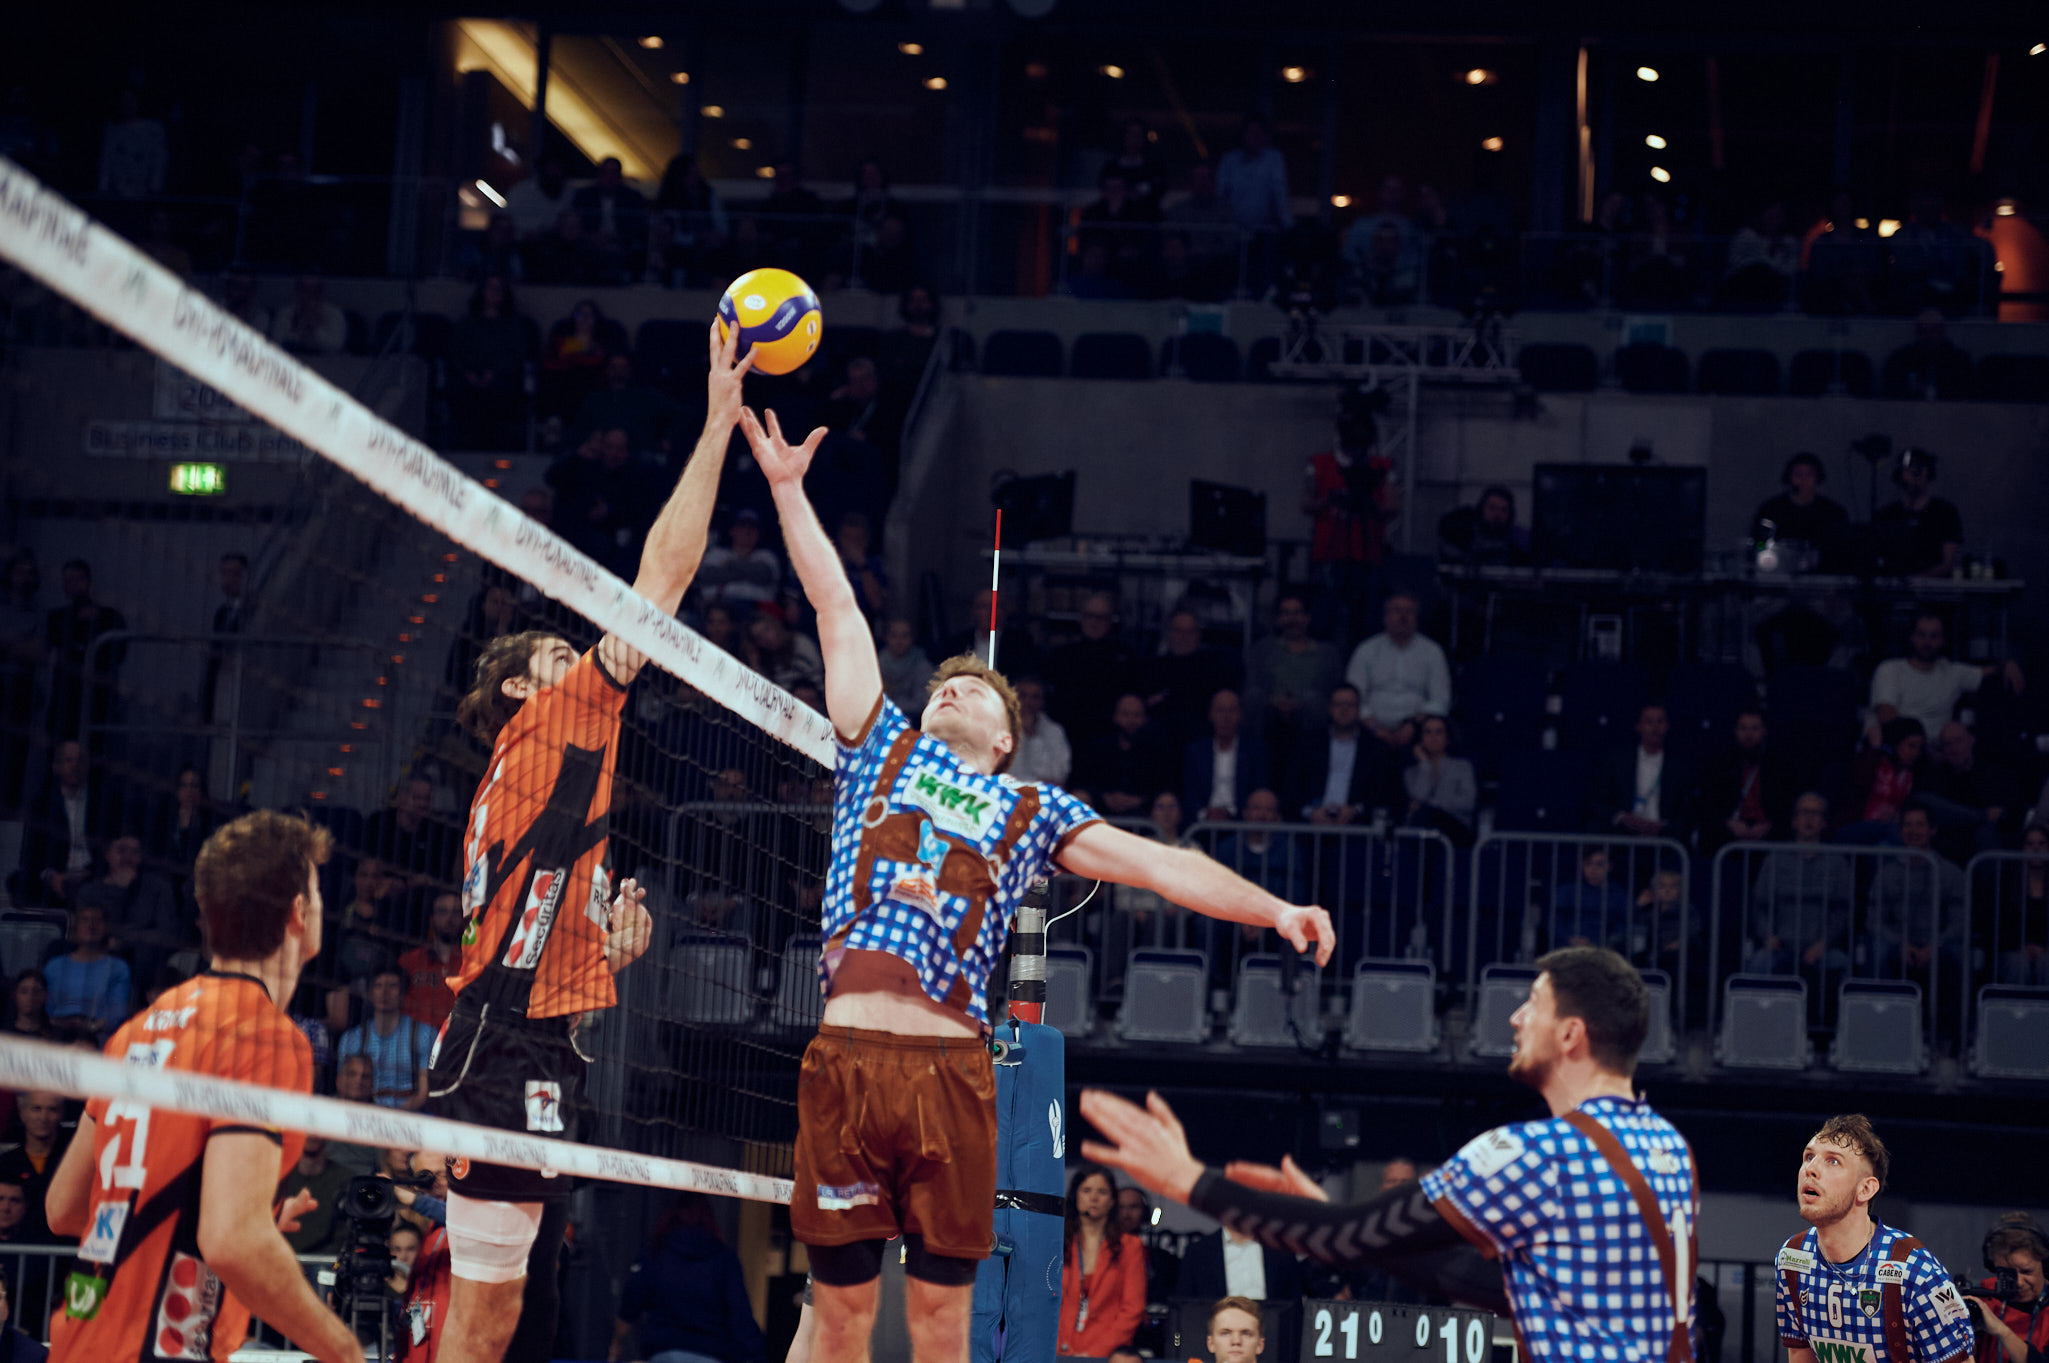
 The right location for volleyball photography - Image: Oliver T. Rubert
You can choose from roughly the same positions for attacking and blocking: Either directly in front on the short sideline (but then with a correspondingly strong telephoto zoom) or directly to the side next to the net. If you're lucky, there might be a grandstand or gallery at the front so that you can work with your camera above the edge of the net. This gives you a full view of the faces on the opposite side of the court without the net in between.
The area between the net and the center of each half of the pitch is definitely the place I would recommend for the start, as you can simply concentrate on the game situations there without having to constantly change your position. A practical side effect is that you usually also have a good view of the team bench from there, where the coaches and substitutes in particular like to provide good picture moments, as they are usually at least as emotionally involved in the action as the players on the pitch!
Which accessories do you need?
My personal must-have accessory for all (ball) sports is the lens hood for my Lens! Not because they are absolutely necessary due to the lighting conditions in the halls, but mainly to protect my Lens. If you do get hit by a ball on the lens, the lens hood acts a bit like a predetermined breaking point and can therefore prevent a lot of damage to the lens.
Otherwise, you should of course also make sure that you have a suitably fast memory card with you, as you will be taking a lot of continuous shots and the faster they can be saved, the faster you can follow the next situations again - sometimes a lot of photogenic situations happen in quick succession! That's why the memory card should have a storage capacity of at least 128 GB. Especially if you have little experience in volleyball and sports photography in general, you will most likely shoot too often rather than too little and should have a corresponding buffer. It happens very quickly that you come out of the hall with 3-4000 photos!
Personally, I always shoot in RAW, simply because I like to keep a lot of leeway in post-processing (especially with the white balance) and a nice to have is definitely a small stool, as seating such as beer benches are rarely provided for the photographers. I've only ever experienced this at the DVV Cup final in Mannheim. But you don't usually need one of these, as you can - if you want - change positions a lot to get the most varied shots possible. Otherwise, you will probably spend most of the time kneeling, as the jumps in particular are much more effective from below.

- swedish quality stool
- sit comfortably on the go
- can be folded up small
- lightweight
Some colleagues also like to have a monopod with them, but this only really makes sense if you are working with high focal lengths, i.e. 300-600mm. You don't normally need it for the "standard telephoto" 70-200mm f./2.8, except for video, as you don't have to hold it up for long periods of time and the magnification is not so strong that a small jerk will ruin your entire composition.
In the end, it is also important that you can transport your equipment easily. It won't do you any good if you end up arriving in the hall loaded down like a pack mule and don't have a hand free for the camera. That's why investing in a good photo backpack is a good recommendation.

Walimex FT-1502 Aluminum Pro Monopod 177cm
- robust and very stable monopod made of aluminum
- max. load capacity: 10 kg
- ideal for sports and animal photography with long focal lengths
- high ease of use thanks to practical Fliplock quick-release fasteners
- Sponge rubber coating on the handle
- incl. wrist strap and transport and storage bag

Manfrotto Monopod Alu 4 Sec
- Aluminum monopod
- with fluid base
- Cold protection handle with optimum grip
- Quick-release leg locks


 Gehäuse")


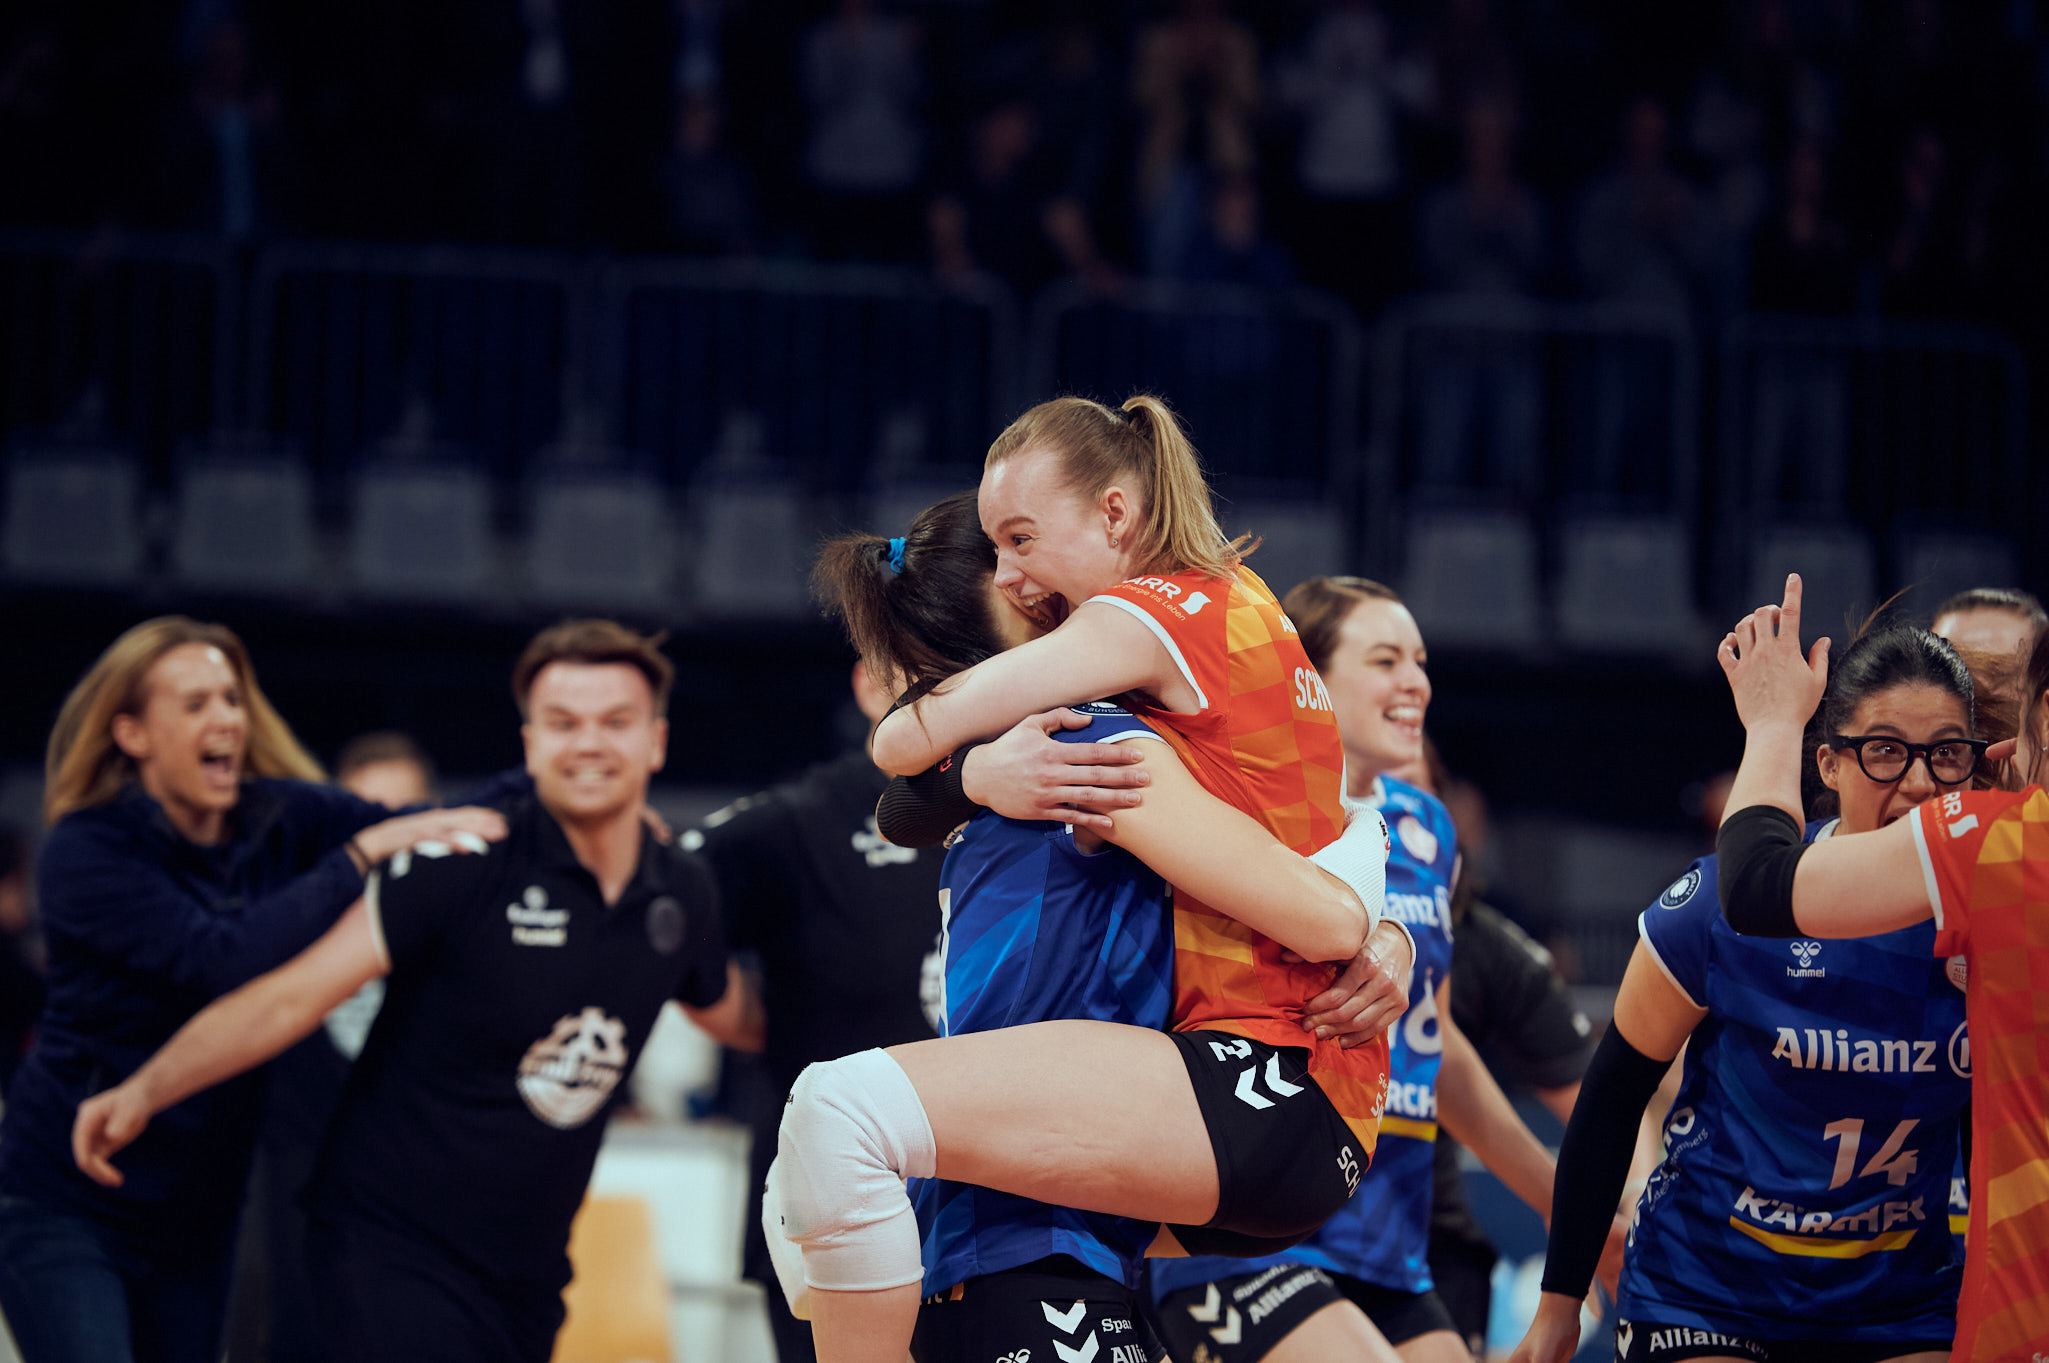 Capturing emotions in volleyball photography - Image: Oliver T. RubertCapturing emotions in volleyball photography - Image: Oliver T. Rubert
What is the best way to edit the images?
In the vast majority of cases, sports photography also means continuous shooting! You quickly come home with 2-4000 photos, which then need to be viewed, sorted and edited. This means you need software for batch processing. Most colleagues would probably reach for the top dog "Lightroom" or "Lightroom Classic" from Adobe out of reflex.
I also tried out this software recently, but for event photography I would recommend the competition: Capture One. Capture One (also known as C1) was developed by the camera manufacturer PhaseOne for their cameras in order to be able to process the large image files of the PhaseOne cameras more efficiently and was then also opened up to other camera manufacturers.
Why is Capture One instead of Lightroom?
But why is C1 now better than Lightroom for this scenario? The answer is: speed! With Lightroom, I still have to wait a little less than a second for each photo to load after import. Then I need another second for the settings to be applied to the image before I can select the next image. With CaptureOne, I don't have this noticeable loading time on my MacBook Air with M1 processor. In my case, Capture One also beat Lightroom quite clearly when exporting.
For me, who in the vast majority of cases does sports photography directly for clients, the speed of my workflow is the absolute number one criterion, as I also have to deliver quickly. That's why, from my experience, I can only recommend Capture One if you don't want to spend hours waiting. But now to the actual workflow! As always with image editing and processing: many paths lead to the photo, my path is just one of many possible examples of how you can structure it, it is not a blueprint of the only correct approach.
The first question is always: where do I save my photos? Here I would advise using an external SSD as a storage location, as you can quickly accumulate more than 100GB per day, so that the main hard disk of the computer is still free. I personally have a SanDisk Extreme Portable V2 SSD with 1TB for my active productions, which is simply super handy and practical. I create one folder per game (and per set for the big events like the German Cup final) where I copy the photos from my two cameras.
From there, the photos are then imported into CaptureOne, where I have previously created a new album in my annual project for the respective event/game (important when importing: "Add to catalog" setting, do not copy into the catalog!) Once these are loaded, I go through all the photos and use a keyboard shortcut to highlight my selection in color and then simply filter them by color. Then I take the first photo in the selection and edit it in detail: Exposure correction, color correction, Colorgrade. I then copy these settings from the first photo to all the other photos in the album and then only need to go through the individual photos and make minimal corrections to the exposure (fortunately not much effort is required due to the rarely changing lighting conditions) and can then export the photos.

Capture One Pro
- Improved noise reduction for better quality images at high ISO values
- New Basic Color Editor is compact and easy to use, one-click adjustment of hue, saturation and brightness
- Revised tools for the high dynamic range with controls for highlights, shadows, black and white
- Visible handles in the cropping tool make it easier to achieve the desired image section
- Pin your favorite tools to the top while you scroll through the other tools
- Easily copy layers and masks between photos
- Support for DNG files
- Speed up import and export and benefit from a smooth editing workflow
- Use the wide range of image editing and color correction tools to bring your creative vision to life in the best possible way
- Transfer images via tethering directly while shooting to review or adjust them immediately after shooting
- Save time thanks to the customizable user interface and create your personal workspace
- Choose the payment method that suits you best - opt for the purchase of a license or a subscription
- Over 500 supported camera models
More about Oliver T. Rubert
I started out in the portrait segment and shortly afterwards lost my heart to event and sports photography:
My name is Oliver T. Rubert and I have been working in the field of event and sports photography for over 5 years now. In addition to the moments that pass by quickly, my work focuses in particular on what happens off the pitch: emotions. Whether it's the team on the field, the coaches or the fans - everyone is passionate about their sport and their team and it's precisely this atmosphere that makes sporting events so special for me. This spirit is what I want to capture in addition to the action scenes.
Starting in 2016 with a small Nikon D3200, I have remained loyal to the system and have now been working with two Nikon Z6s for 3 years.
In addition to sports and event photography, I have found my creative playground in cosplay, both as a photographer and as a model. Even though - or maybe because - it is a very strong contrast to my professional, photographic work, it helps me to constantly challenge myself and deal with new techniques and stylistic elements, which I might not be able to experiment with for my clients.
You can find my photos on Instagram at @otr.photo, my work as a cosplayer and model at @otr.cosplay.
My website: www.otr-photo.de


